Regrowing Celery from Scraps: Water, Potting & Care
Regrowing celery from scraps starts with the intact bottom of a celery bunch. Stand a healthy cut base in shallow clean water, keep the upper crown exposed in a bright position, and change the water regularly. Once roots develop, you can move it into potting mix. Expect a small leafy growing project rather than a guaranteed replacement for a shop-bought bunch.
It is a useful way to watch how a plant grows from its base on a kitchen windowsill. The important decisions are which piece to keep, how much water to use, when to pot it up and when to stop if it deteriorates. A few new leaves are progress; they are not proof that a large harvest is just days away.
What can actually regrow from a celery base?
A connected crown can produce new leaves from its centre. A loose stalk cut away from that base is a different piece of plant material and is not the starting point for this method. Iowa State Extension’s kitchen-scrap guide describes celery alongside other crown-forming vegetables and sets realistic expectations for small home projects.
Start with one base from celery you were already preparing for food. If you mainly want regular harvests, growing a suitable crop from seed or established plants is a more deliberate plan. Our green-onion regrowing guide covers another scrap project with a different growth habit. Keep the two methods separate instead of assuming every vegetable behaves alike.
Gather a simple windowsill setup
- One firm, sound celery base with its central growing area intact.
- A clean knife and cutting board for preparing the base.
- A shallow, clean dish that supports it upright without submerging the crown.
- Fresh water and a bright, accessible growing spot.
- A drained plant pot and vegetable potting mix if roots establish.
Choose a dish you can empty easily and a location you will remember to check. A display hidden behind other pots makes it harder to notice cloudy water or a soft base. Keep the experiment away from raw-meat preparation and do not use a visibly rotten piece just to avoid discarding it.
Step 1: preserve the bottom and start in shallow water
Cut roughly 5 cm (2 in) above the bottom of the bunch, leaving the stalk bases connected. Illinois Extension’s celery method uses a base of about this size. Use the sound upper stalks in your usual cooking; retain the firm lower section for growing.
Stand it upright with the bottom in water and the top exposed. University of Nevada, Reno Extension describes about 1.3 cm (½ in) of water for the shallow-bowl method. The aim is contact with the bottom, not a bowl filled to the top of the cut stalks. Add water gently so the base stays upright.
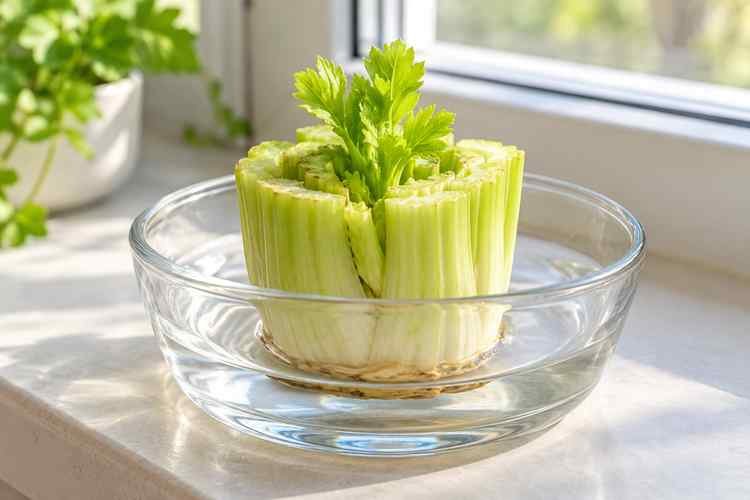
Leave the central bud uncovered. If the bowl is too deep or unstable, choose another container rather than packing plant scraps tightly around it. Note the start date and take a simple reference photo if you want to compare growth; there is no need to disturb the base repeatedly to check it.
Step 2: keep the water fresh and watch the centre
Check daily for water level, new leaves and the condition of the base. Published methods differ: Iowa State changes water every two to three days, while Illinois recommends daily changes. For a simple home routine, refresh it daily and rinse away loose debris. Change it sooner if it becomes cloudy; investigate the base rather than just topping up dirty water.
Place the dish in a bright window. Nevada Extension recommends a sunny indoor position; the Illinois Eat.Move.Save. project also uses a window setup. Observe the actual spot rather than relying only on its direction: a nearby building, curtain or deep sill can reduce light. Avoid a position that overheats the dish or leaves the new growth pressed against cold glass.
New central leaves may show before an obvious root system. Give them time, but do not treat a published day count as a deadline. Keep checking firmness as well as green colour. If the whole base becomes mushy, foul-smelling or visibly rotten, discard it and clean the dish before beginning again.
Step 3: move a rooted base into potting mix
When roots form and the base remains sound, decide whether to continue the short water project or pot it up. Iowa State notes that a plant in soil can be more productive than one left in water. This shallow-water method is not a complete hydroponic system with managed nutrients, oxygen and water chemistry.
Use a pot with drainage and room around the rooted base, filled with moistened container mix. Maryland Extension explains the air and water needs of container roots. Ordinary dense garden soil is not an equivalent substitute. Our potting-mix guide helps you compare bags, and our drainage guide covers outlets and outer pots.
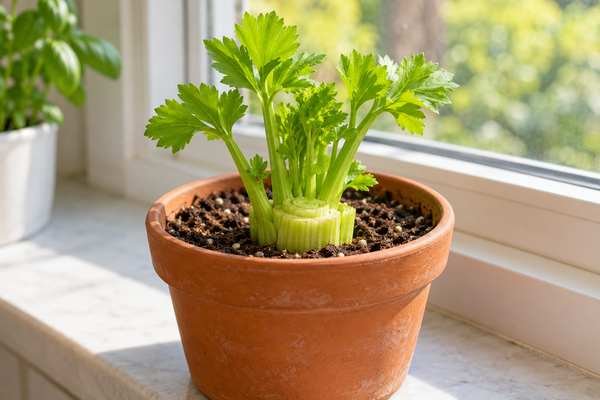
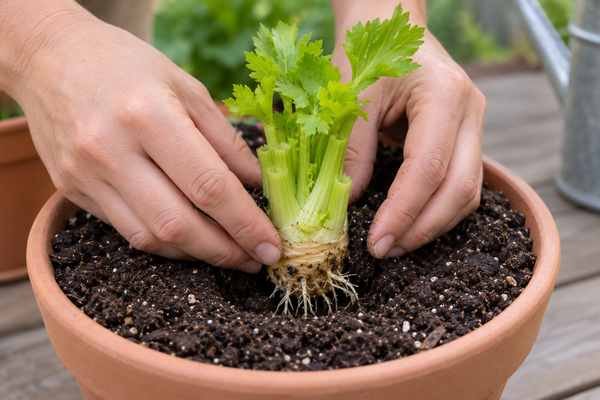
Make a hole that receives the roots without forcing them into a tight bend. Settle mix around the roots and lower base while leaving the top and central leaves exposed, following Nevada’s planting approach. Firm gently and water in. A small initial pot is an establishment step, not a promise that the plant can remain there indefinitely.
Light, watering and feeding after potting
Check the mix near the root zone and keep moisture consistent while excess water can drain away. The RHS celery guide emphasises the crop’s need for sustained moisture. A pot should not alternate repeatedly between bone dry and saturated. Our container watering guide explains how to assess moisture before reaching for a watering can.
Read whether the growing mix already includes starter feed. If a rooted, actively growing plant needs further feeding, use a product labelled for edible container crops at its stated dose. Maryland’s maintenance guidance cautions against excess fertiliser and salt buildup. More fertiliser will not repair a rotten base or replace adequate light.
For a move outdoors, choose a suitable mild growing window and gradually introduce outdoor light and wind. UK and US dates vary greatly; use local guidance rather than moving a tender windowsill plant outside simply because its roots are visible. Inspect new growth and leaf undersides for pests during routine care.
Harvest modestly and handle leaves cleanly
Allow enough healthy new growth to remain before taking a small amount. Trim usable outside growth with clean scissors while preserving the central shoot. If the plant barely has a few leaves, keep observing instead of repeatedly cutting it back. Regrowth depends on the condition of that individual base and the care it receives.
Rinse harvested leaves under running water before use, without soap or detergent, and refrigerate promptly if not using immediately. FDA produce-handling guidance applies to homegrown produce too. Washing reduces contamination but does not eliminate all bacteria; rotten material should not be harvested.
Troubleshooting celery regrowth
| What you notice | Check first | Response |
|---|---|---|
| No new growth | Was the connected central base retained? Is it firm and receiving light? | Correct the setup; replace a deteriorating or unsuitable base |
| Cloudy water or bad smell | Debris and the condition of the base | Refresh and clean; discard a rotten base rather than masking the smell |
| Pale, stretched shoots | Available window light and crowding | Improve the position without abruptly overheating the plant |
| Wilting after potting | Root-zone moisture, drainage and the exposed crown | Reassess moisture and light; do not add feed as the first response |
Frequently asked questions
Can I regrow celery from a single stalk?
Use the connected bottom of the bunch with the central growing area intact for this method. A loose stalk is not the same starting material.
How long does celery take to regrow?
Leaves may appear within days, while roots and further growth can take longer. The base, light and temperature affect progress. Judge the plant’s condition rather than expecting a complete bunch on a fixed date.
Can I leave it in water?
You can maintain a short leafy project in clean shallow water, but long-term cropping needs more than plain water. Potting a sound rooted base gives it a more substantial growing medium.
Will it produce celery forever?
Do not expect that. A regrown base can decline, flower or stop producing useful growth. Treat any harvest as a small bonus and replace the project when it is no longer healthy or worthwhile.
Start with one healthy celery base
Regrowing celery from scraps is most satisfying when the goal is clear: observe new leaves, keep the setup clean and try potting a rooted base. For a broader crop plan, use our garden planner alongside local growing advice. One well-observed base is a better first step than a windowsill crowded with neglected bowls.